
Workflow
- Update your phones to the latest operating system
- Log-in to your primary T-Mobile account however you like
- Disable all SIM Protection features for all lines under Line Settings or Security (I forget where exactly). You should be able to toggle both lines off on the same page
- ALSO Remove SIM Protection from your line feature add-ons. This is the page where you can buy new add-ons, but instead you’re just removing the add-on. You must do this line by line
- Confirm your phones are unlocked. If T-Mobile does not have a status, they are likely unlocked. Call if you’re unsure but don’t let them send you to customer retention. If they ask, just say you’re thinking of selling your phone
- Log-out of the T-Mobile account
- To request a temporary port out PIN using your Primary account phone:
- Turn off wifi. Using Cellular data on your primary account phone, log-in to your T-Mobile account
- Using the upper right search box, type in Port Out
- Tap on the first result for Port Out PIN. The website should attempt to authenticate that you’re using your primary account device. If it fails authentication, log-out, toggle Airplane mode on and off, turn off wifi, and try logging in again and repeat the above. This was the most frustrating part: their help is out of date or they purposefully removed port out PIN from line settings. Last resort, to save frustration from boiling over, you may need to call them. Just tell them you’re moving to another country and that should prevent customer retention maneuvers. While you’re on the phone, check your device lock statuses
- Write down your Port Out PIN. This PIN is for all lines on your account
- Write down your T-Mobile account number
- Transfer your non-primary line first, then lastly your primary account line:
- At US Mobile or your new carrier, check-out and begin activating/porting the secondary or non-primary line. Take note if you’re signing up for Dark Star (AT&T), Warp (Verizon) or Lightspeed (T-Mobile)
- If you text with Android people, you’ll want RCS. So choose Dark Star
- You’ll need to enter your T-Mobile account number and the port out PIN
- Eventually your new carrier will issue an eSim QR code to your email and/or account line settings
- Your secondary line must be on Wifi
- You should wait until your phone goes into SOS mode or no longer has a signal. That will indicate that T-Mobile as disabled your eSim
- Your secondary line will be removed from the T-Mobile account
- From the secondary phone line, scan the eSim QR code or, if you have it on your phone, long-press and tap Install eSim
- Follow the prompts
- It’ll take a minute or two
- If your T-Mobile eSim was disabled before you installed the new eSim, then you should be good to go. Now port your primary line as you did the secondary
- If your T-Mobile eSim was not disabled before you installed the new eSim, you may need to go into your phone’s Cellular settings and swap your eSim to the new one
- If you’re using US Mobile, I suggest that you install their Cellular profile for a better experience. You’ll need to know if you’re using Dark Star, Warp, or Light Speed
- Once your primary line is ported from T-Mobile, you’ll no longer be able to log-in to T-Mobile
- You can then delete the disabled old eSim under Cellular settings
- Be sure to call your own phone number from your phone to set up your voicemail
Randomized Albums in Track Order on Sonos (and Jellyfin)
Most music platforms focus on individual songs and not albums. I’m a completionist and love to listen to full albums. But most times I end up paralyzed on what album to listen to. So whenever possible, I listen to a random sort order of albums that are in track order. Sonos software and equipment do not make this easy. So I’ve resorted to a semi-manual system to create M3U files with shuffled albums in track order.
Sonos music libraries, sourced from a local network share, can import M3U files. M3U files are list of files. If you store M3U files at the root of your Sonos music library, you can use relative paths and Sonos will usually be able to find everything. My music library is structured as /Artist Name/Album/track#_song_title.flac. I’ve cleaned out special characters from file names such as diacritics using the fantastic macOS app Transnomino. Diacritics can really mess up some scripts. Turns out this folder structure is also a good choice for the JellyFin media server.
Once you have a good folder structure, then my manual process is ready to fire off. It requires a *nix operating system, the Python mkpl script for making M3U playlists, and your choice of way to randomize text lines. Which you can definitely do in the shell but I prefer the macOS app bbedit.
First I generate a comprehensive list of album folders using this cobbled together shell script. I probably got most of the code from searching Stack Overflow, since I often find bash scripting incomprehensible. This script makes an assumption that the list of folders will be used for a final command line tool so paths are quoted and have a \ for script line continuation. I assume you understand how to use bash scripts. Careful though, different versions of sed can do different things so maybe you’ll have fun with that.
#!/bin/bash

if [[ -f albums.txt ]]; then
    rm albums.txt
fi

find . -maxdepth 2 -type d | while read folder; do
    if [[ $folder == ./*/* ]]; then
        echo "$folder\" \\" >> albums.txt
    fi
done

# Remove the first two characters of each line, should be "./"
sed -i'.bak' -e 's/..//' albums.txt

# Insert a " at the beginning of each line where \1 is the matched group
sed -i'.bak' -e "s/\(.*\)/\"\1/" albums.txt
I then review the output to fix any obvious errors.
Then, I make a quick bash script that makes use of the Python script mkpl. Here’s an example:
#!/bin/bash
today=`date '+%Y%m%d'`;
filename="Shuff_Albums_$today.m3u";

mkpl -d \
"Wings/Band On The Run" \
"The Jesus and Mary Chain/Hate Rock 'n' Roll" \
"Cat Power/You Are Free" \
"The Wrens/The Meadowlands" \
"The Housemartins/London 0 Hull 4" \
"Stereolab/Mars Audiac Quintet" \
"The Jesus and Mary Chain/Stoned And Dethroned" \
"Catherine Wheel/Chrome" \
"Blind Pilot/3 Rounds And A Sound" \
-g "UNICODE" -o $filename;
mkpl -o means use track order. It probably helps that I use track numbers at the front of each song filename, as it’s likely not all song metadata includes track data.
Then, I use bbedit’s Text->Sort Lines->Randomize Order (Sorted Lines replace selection) upon the selected folder list. Once the albums are randomize, I then decide if I have any new albums I want at the top of the playlist. Then I run the final random album M3U script, with the final M3U file at the root of the library, and have Sonos update the music library. Done.
My operational script also makes M3Us for recently bought albums and a time-limited shuffled track playlist for driving and the office. The mkpl script is very handy with all sorts of options for playlists. Those additional M3Us are generally meant for my JellyFin media server, which happily imports these M3Us too! Manet is my favored iOS app for using my self-hosted Jellyfin server. Jellyfin uses the same media library as Sonos.
A problem for me is, the Sonos app on iOS still cannot go to the currently playing song in the playlist view. Scrolling through long playlists in the iOS Sonos App is awful. But the macOS Sonos app does go to the current playlist position and it is only slightly less awful to scroll through.
Hope this helps somebody.
Tips for Porting out of T-Mobile (mid-May 2025)
T-Mobile raised prices on their "uncarrier” plans that, in plain language, originally claimed prices would never increase. So as T-Mobile is now like any other carrier, I transferred our lines to US Mobile.
Rather than tediously explain my decision, I’ll offer some tips to port your lines to US Mobile, and probably any other carrier. The instructions below may seem daunting, but it really is easy provided you can convince T-Mobile’s account website to give you a port out PIN.
I apologize that I can’t give specific page names as T-Mobile disables your account soon as the primary line is ported over. This is why you must first start with a non-primary line (if you have one).
As of 5/17/2025, using eSims:
Dynamic Range Priority Added to "What was my Fujifilm Recipe?" macOS 12 Shortcut
I’ve updated my “What was my Fujifilm Recipe?” macOS 12 Shortcut. It now includes support for Dynamic Range Priority. The “Scanned Superia” recipe from fujixweekly.com is added. The Shortcut now uses SHA1 hashing, as on modern processors it is much faster than MD5 (Intel and M1 Macs). I removed Grain since I often override it and it doesn’t seem important to ID recipes. Finally, I prefixed “Saturation " to the saturation keyword so that it is clear as to what that keyword refers to.
You can get more information at the Shortcut’s page or grab the Shortcut here. Remember, this requires a Mac with exiftool to be available and in your path (or you can manually hardcode the path in the Shortcut).
There’s a thoughtful post on Fuji X Weekly. After spending several weeks with a X100V, I’m in agreement with the utility and power of Fujifilm Film Simulations. As a hobbyist, it is liberating embracing Fujifilm out-of-camera JPEGs. I barely need the RAW Power app.
Pandoc now available for M1 Macs via Homebrew
The amazing document converter, Pandoc, is finally available from Homebrew for M1 Macs! So I’ve adjusted my journal workflow to be on my M1 Mac mini. I’ll use
jhead -autorot *.jpeg(instead of Graphic Convertor since I only have one license and I want it on my MacBook Pro) for autorotating photos and
for f in *.md; do pandoc $f -o ./Archive/${f%.md}.pdf -t latex; done to convert the Markdown files to PDFs.
MeteoBridge Email Weather Alerts & FastMail
MeteoBridge reports my weather station data to all sorts of services. To be rid of IFTTT, I finally set MeteoBridge up to send an email if certain weather conditions happen. And FastMail, to my surprise, has a rule Action for notifications! Yeah, definitely don’t need IFTTT anymore.
I used the Controller app to create an automation that triggers upon press of my Logitech doorbell button. Then I converted it to a Shortcut so that upon doorbell press, my dining room lights will flash. Real cool. So the light is Set on or off and then reversed depending on the light status.
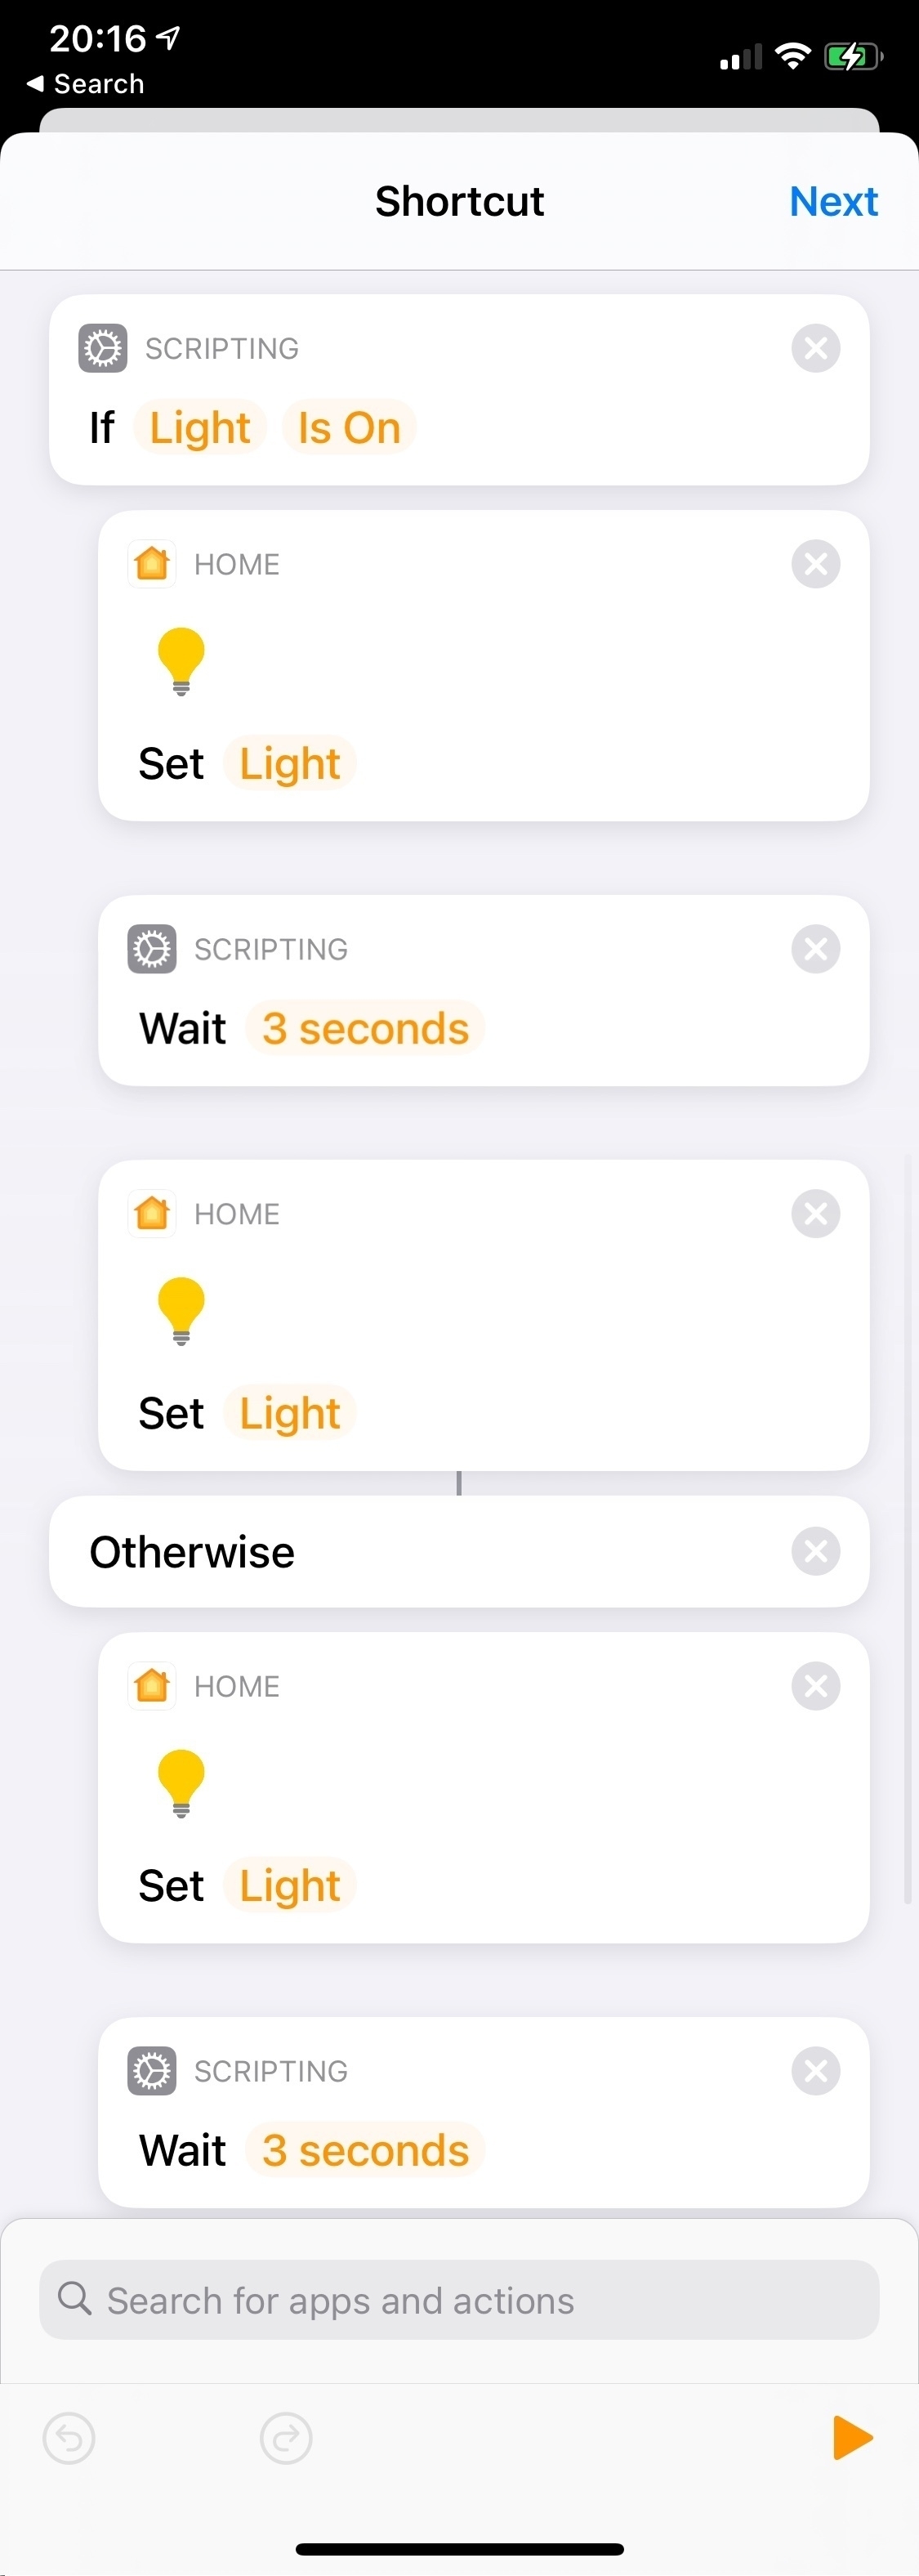
I’m experimenting with HomeKit Automations converted to Shortcuts. This one, when a Home member arrives, will turn on a welcome light if the Logitech doorbell reads < 200 Lux. Otherwise it’ll flash the living room lamp to indicate an arrival.

Automating Deselection and Unchecking of Twitter Interests - EvilTester.com
Automating Deselection and Unchecking of Twitter Interests - EvilTester.com: The final JavaScript works to automatically deselect Twitter ad interests, but I had to change the timer from 2000 milliseconds to 10000 milliseconds or 10 seconds per uncheck to avoid Twitter Over Capacity errors. The process is taking forever but isn’t invasive at all so this Safari JavaScript console automation can go all week for all I care. By Twitter’s estimation, I am interested in everything in the universe. Including things that greatly raise my blood pressure. Ugh.
From the above website but milliseconds modified from 2000 to 10000. Paste and run in your browser’s JavaScript dev console when on the Twitter ad interests page:
var timer=100;document.querySelectorAll(
"div > input[type='checkbox']:checked"
).forEach((interest) => {
setTimeout(function(){interest.click()},timer);timer+=10000;});
My typical workflow: here’s a thing I need to do. Hm. That seems more difficult than expected. What’s easier than that? And easier than that? No, that’s silly and overcomplicated. Easier than before that? Can I live with that? Probably. Not what I wanted but A-OK.